Thursday, August 19, 2010

So Close!!!

Welcome back, quite a bit of changes have occurred since the most recent post... Ataraxia is about to be born!
She is sitting in my garage with her nomenclature drying on the starboard bow. There is plenty of touchup work to be done for sure, but frankly she is beautiful despite any minor imperfections. I think I am excited because as I have never had a child this must be as close to that emotion as I can imagine.

Here is a brief look back over the last 6 week's progress:


Well frankly, you can't really use a 17' sailboat all too much if you can't move her from place to place. So, as a result I purchased an absolute piece of garbage galvanized steel trailer back in June to hold Ataraxia. The catch, every single bolt was so rusted through that the instant a wrench or set of pliers was set to it the bolt flaked apart to the solid steel core and couldn't be moved. So, what do to? Drill baby drill! The above photo is the result of a titanium carbide drill bit boring directly though a galvanized steel bolt. Very satisfying.

Well, after a bit of drilling I figured I'd better attach some pad eyes to the mast if I was ever to hang any sails off her. It was actually pretty sad for me to take a drill to the finely hand-crafted wooden mast I built a few months earlier. But after dealing with the obnoxiously messy silicone caulk I was done.


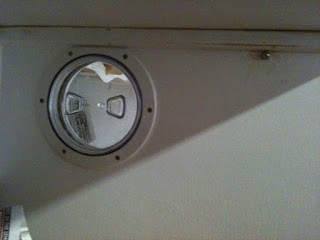
Pretty simple picture, the cowls are in, and the topsides are painted white. She gets prettier.


See, told you. Here is the cockpit fully painted with the non-slip marine paint. I hate marine paint. It's expensive. But at least I can stand in my boat without falling over when she's heeled over with her rail in the water. I can't wait for that moment with the stereo up flying through the water...
She's getting prettier eh? The anchor well is done, cockpit is done, all she needs is a companionway hood and slide, and we're off! (the tabernacle is already done and removable along with the mast.)


Ok, so I was an eighth of an inch off in having a perfectly square companionway slide. I'll fudge it so it's perfect. Planers and bench grinders are good like that.


Ataraxia! Let's go sailing in a couple weeks!


Monday, June 28, 2010


Well, a lot has happened in the last month or so since my last post. At least in regards to Ataraxia being completed. Not much has changed with regard to any other aspect of my life. But then again, that's not always a bad thing. I will likely be taking the rest of this week off from working on the boat since I'm heading down to Mexico for a few days. After all nothing says patriotism like getting the hell out of the country for the 4th of July, right?


Anyway, here's a close up of the port side rubrail near the stern. I thought this was acool shot b/c it really shows the nice wood grain on the khaya mahogany rail. It's actually three pieces of wood each of which is slightly thinner than the previous, and then the whole thing is sanded down and coated with epoxy and varnish creating the nice glossy finish.

After several coats of ablative bottom paint, and the navy blue topsides paint I pulled off the masking tape between the two and held my breath. Luckily, the line between the two was literally perfect.

Here's the bowsprit getting it's last coat of varnish.

Here's the completed mast. I was actually really nervous about building this. In the end though, it turned out to be easier than I had anticipated. Basically, I started with a 16' piece of sitka spruce and sliced it into two 3" wide pieces and two 2.25" pieces. Then came the hard part of marking them according to the plans and creating a very gentle taper almost the entire length so that the ends were the original width, but the top was about an inch. The next big step was to use the router to cut long rabbets through the 3" wide pieces the entire length of the mast. By doing this, all four pieces of wood fit snugly together to form a long wooden square tube. I then cut a few plugs that fit into the ends for a couple of feet and epoxied the entire structure together with far less clamps than I probably ought to have used. However, the epoxy cured nicely although since I was a moron and decided to use my vise as an extra clamp I did put a small crack about 2" long in the middle. I'm hoping that by filling that crack with epoxy, and epoxying some fiberglass overtop that in the end it will still be strong. It would certainly suck to have my mast snap in the middle of the ocean somewhere. Hopefully, I will have an outboard on the back of the boat by then. Once, all of that was completed I used a big roundover bit and routed down all of the edges so it looked nice and smooth. After sanding it down to near perfection I epoxied the crap out of it, sanded again, and then varnished away. One more step completed!

Here's a nice shot of the centerboard finally going in. Hopefully it will never come out again. It seems to slide smoothly in and out of the centerboard slot so it seems pretty good so far!

Now, since this is my first boat I knew I was going to need a way to move it from place to place and since I never planned to own a boat when I bought my car I figured I needed to get a hitch for the car. I went down to the local U-Haul store, ordered my hitch for $149 and I was told I would need to spend $80 an hour to have them install it. After a not so silent, "Fuck you, I'll install that fucker myself." I had ordered my hitch and went in about 2 weeks later to pick it up. (I don't think it was the same guy)
Lucky for me, I know a former helicopter mechanic from the Marines who has lots of tools he seems to be willing to let me borrow from time to time. We began by jacking up my car and getting it on some jack stands and cranking away at the bolts on the frame. Unfortunately, a couple of the bolt holes were severely rusted so I took my car up to his place a few days later to use his impact wrench to really get that sucker on there. I want an impact wrench now. It makes fun noises.
Here is the beauty of craigslist. Someone has an old trailer they aren't using. I have $100. Using craigslist, we find each other and exchange. Pretty simple. I hear it's pretty commonly used for sexual favors these days too. Clever whores.
So yes, the trailer is a piece of shit. But, I figured if I can build a boat, I can retrofit a trailer. So off to Home Depot I went with absolutely no idea what to do. I stood in the aisles of the store mentally planning what I thought I would need...

And after much imprecation and burn marks from flying sparks (and destroying several bits for my dremel tool) I had cut off numerous old rusty bolts, installed new ones and built some bunks to support the boat. Keep in mind that the weight of the boat is to be on the keel, the bunks re merely to keep the boat upright on the trailer. And....

As I like to say to a girl I've just kissed for the first time, "Ta da!" She fit! Kind of. I pretty much nailed the height of the front end of the bunks, but I'd say I'm a good 3-4" off of where I needed to be on the stern. Oh well, The bunks seem a little flimsy and the bunk itself doesn't conform to the curvature of the hull. Once I return from Mexico I intend to build new and far more sturdy bunks. Along with several other things like working taillights, tie-downs, fenders, and perhaps a nice starboard side wheel.


Oh, and I suppose I'll have to get it registered too. And yes, I will be repainting the transom now that the cockpit footwell drain holes are in.

It looks a hell of a lot bigger now that it's on the trailer and behind my car. The whole thing is taller than my car now and I haven't even built the tabernacle on yet!
Ok, here I was starting to get a little nervous. It was kind of a gray afternoon, my friends had already started to imbibe heavily. (Yes, I understand the beer is to be handed out after flipping the boat. But my friends don't take kindly to being told to wait for their libations.) So, I had the stressful job of backing the trailer into my garage. Bear in mind my workbench was in the same bay as the boat was to be. The boat is approximately 6'6" wide near my narrowest point in the garage. The narrowest point in my garage is just under 7'6". You can see my dilemma. To complicate matters, I had to back the trailer in at an angle because of the way my driveway bends. Fun times. Oh, and have I mentioned that I've never driven a trailer before. Ever.

So... it took about 4 tries, and far too many people telling me what to do.... But I eventually got her in.
Ok, I got her 2/3 of the way in and then we cheated and pushed the trailer by hand. Bite me.

I have since relocated my workbench so I should be able to get her in and out a little easier next time. I hope.
And after a little work today, I had to show the trial fitting of the bowsprit. Pretty cool huh?

I probably won't get too much done in the next few days, I figured I needed a good mountain bike ride tomorrow to get some exercise before I do my best to do everything I can to develop early onset cirrhosis this weekend in Mexico. This is going to be one interesting 4th of July...

Wednesday, June 2, 2010

Cuprous Thiocyanate Smells Good

Ok, admittedly that probably doesn't sounds like the healthiest title for a blog post. But I have always loved the smell of fresh paint. However, this particular paint has a stranger and strong odor from what I was used to. It contains a very high copper content and is meant to wear off (which I find odd considering it costs about 10 times more than regular paint) and has to be reapplied essentially once a year. Yes, this boat is turning out to cost a bit more than I had planned. Admittedly however, I did not NEED to use khaya mahogany for the rails or African Lacewood for the deck. But they are damn pretty.

So as you saw in the previous post, the boat was rolled over and I subsequently fiberglassed, epoxied, and saned the entire hull. This took the majority of the last month (especially the sanding) but I am happy to say my hands and blood vessels have become quite accustomed to the sander's vibrations. That carpal tunnel syndrome will feel great in a few years. Awesome. So, here she is being jacked up with my car jack so the keel is perfectly level. This was a necessity to strike the waterline...


I found this amusing, I didn't have enough scrap wood laying around to support the boat once it was level, so I improvised. This is out-of-code beer that I had laying around my house which supported the 800 pound boat and myself on top of it quite easily. Each side has about 3 cases of beer holding it up. Now, I'm sure many of my readers will consider this a horrific abuse of money and/or beer. Normally I would agree. However, I have the wonderful fortune of having more beer around my house that you could possibly fucking imagine. And no, I don't pay for it. (Although, I think I will have to scrounge up some cash for that liver transplant in a few years)

Fuck me.

As I mentioned earlier, here is the waterline after it was striked using a laser level. The laser level was a very cool tool. No matter what position I set it down, I could adjust a few settings and perfectly match the previously ascribed line. Then I masked it off with some tape... washed her down with some very foul smelling chemicals that literally dissolved the latex gloves I was wearing right off my hands and....
Started painting!

Here she is after the 3rd coat was applied, and the dried. I pulled off the masking tape and much to my delight a perfect waterline! (I thought for sure some tiny bit of paint would have soaked through or underneath some tape that wasn't applied just right.

From another angle.
But instead of just working on the boat for Memorial Day weekend I did a little backpacking with friends. Here we are in Vermont, with my ex-Marine buddy Paul and his puppy Chief. Chief is doing a great job of balancing on the logs that I fell onto in the middle of the night subsequently cracking a rib... Yes, I suck. But I toughed it out with my pack and came home to work on the boat.

Coming up next: Dark blue topsides, close-ups of the mahogany rails, and hopefully a fully sanded and painted cabin interior!


Tuesday, May 11, 2010

Inverted!

I have to admit that now that the weather is warm there has been a rally of frenetic activity to complete my boat. Granted I'm still a ways off, but I'd like to think I'm still on track to get her in the water for at least a couple weekends before the end of summer. Granted I have acquiesced to the reality that it will be a bare bones sailboat. I very much doubt electronics and a radio, much less a solar panel will be installed any time soon. Whatever. A stereo, a 2-way radio, and a cooler packed with good drinks will accomplish my needs for the summer.

As you will see below, the hull is essentially complete along with a few extras. The next major milestones are to finish glassing the hull (although I completed this today) then sand the entire thing down which will likely take a week!


This is a shot right after the top of the cabin was epoxied down. Notice all the plywood square pads. These are to help spread the pressure of the screws as the epoxy cures as well as protect the actual cabin roof from any excess damage of the screws being cranked down nice and tight. These plywood pads have been invaluable in both roof and being reused on the mahogany rub rails later on.

The perspective kinda sucks but here is a shot of the cabin once it cured and the edges were all sanded down. I have to admit I was a big fan of this step.


I decided to get a little creative with building my tiller. I used lacewood for the interior cabin of the boat and I have obviously been using a lot of sitka spruce for the important areas such as the mast/bowsprit/etc. So I decided it would be fun to utilize that theme to create my tiller. I sliced 1/4" pieces of lacewood and spruce on my table saw and subsequently used epoxy and a plywood form with the curve I wanted to achieve and anchored the layers down to cure. Sure enough, after using the power planer (awesome tool by the way) the next day I had the above beautiful piece of laminate to subsequently cut out the tiller you'll see in the picture below. Pretty.


Here's a quick shot of the bowsprit, it's actually two pieces of spruce laminated together with epoxy. Apparently, this is actually now a stronger piece of wood that just a single baulk. Unfortunately my garage isn't long enough to lay the sprit out to it's full extension. Bummer, cause it would have been very satisfying.


Yeah, I'm just tossing this photo in to brag at how awesome my seats were at Fenway a couple weeks ago. You're jealous. Oh, and I didn't pay for them.

Ok, here is the second of three layers of the rubrail going on the starboard side. This is mainly to bounce of docks and to step on as (or others) push off. I've been given a lot of shit for choosing some very nice khaya mahogany for the rubrails but what I think people fail to realize is that they will be coated in epoxy and varnish too. I think most of m blogreaders fail to understand how tough that shit really is. To give you an idea, an unsanded piece of epoxy with an edge can quite easily slice your finger wide open. Don't believe me? Want to see the scar?
Here is a group of my friends helping me roll the boat over for the first time! It was surprisingly easy to get out of the garage, into the driveway, and rolled over utilizing some tires and carried back into the garage. I would like to thank my friend Raych for taking these pics as I was obviously directing my minions. (That's right Paul, you're my minion!)

On her side! And the rails didn't move a millimeter despite being anchored down earlier that day. (Damn epoxy is cool)
Nice butt Mags. So here she is upside down and back in the garage. Considering I had quite a few friends over that day to help me roll her, we all went up to the roof deck to consume large quantities of beer/wine/whiskey. It turned out to be quite the raucous occasion. I had cleaned up the garage prior to my friends coming over by using my shop vac to clean up all the sawdust and epoxy dust as well as discard lots of wood scraps. Unfortunately, I did not count of my friend Presley tossing a still burning cigarette into said trashcan in the wee hours of the morning by accident as we went to bed. Needless to say, being awakened by the Fire Department at 5:30 am and being interrogated as to the cause of a trashcan fire while still in a state not even remotely resembling sobriety = not fun. Stupid Prez. However, once we realized we had dodged a serious bullet with no major damage... my friend Jeff brought out the 21 year old Scotch to celebrate as the sun rose.

Sunday afternoon was not fun.

Tuesday, April 6, 2010

Holy Crap, Two in a Row!

I'm feeling ambitious and doing yet another update today to brag about my productivity. (It's funny how taking a few days off from the creature will see your productivity rate soar)

I followed through with most of my ambitions from yesterday and sanded down the top of the starboard seatbacks where sailing hardware and mooring cleats will someday be anchored. I also finally cut out the roof supports, routed down the edge to make them less intrusive in the cabin, and epoxied them in. Here's a few photos:


This is the top of the starboard seatback. Spinnaker hardware will be mounted here eventually. Tomorrow I will hopefully anchor the top of the seatback in permanently. I still have quite a bit of sanding to do on the port side. Perhaps I'll purchase a heavier duty grinder soon...


Here are the roof supports being epoxied in. The supports just give the roof something a little wider to rest on while being epoxied in.


As you can see here we have the almost completed dorade boxes. Once the roof is in place over everything I will cut a few holes on top and again on the interior wall leading into the boxes and attached a couple of dorade vents. This will give me a nice little breeze while I'm camped out in the tiny cabin and it won't feel so stuffy. Pretty cool.

Tomorrow's plan after work is probably just a ton of sanding. I have a few small pieces of timber to anchor inside the dorade boxes as well, and perhaps I'll get the seatback tops on. All this is leading up to getting the roof anchored down on Friday or Saturday and beginning work on the companionway hood...


Monday, April 5, 2010

Loving the Early Spring Weather!


Well, it's rather amusing that the last post I wrote had to do with skiing and here we are 6 weeks later and it feels like mid-summer in New England. I don't exactly pretend this weather will hold out and I'm sure we'll get at least another week or two of crappy New England late winter weather. But here's hoping!
I have gotten quite a bit done since the last post, including installing the seatbacks and the remaining flotation foam. The bow is pretty much complete, fiberglassed and the upper breasthook is in. Over the last week or so I cut out the pieces that will create the cabin hood and put the final coat of epoxy on them today. I also installed a few pieces of wood in the seatbacks to anchor the spinnaker hardware and a mooring cleat near the stern. Lastly, I put the final touches on the fillets completing the installation of the dorade boxes. All in all, the boat is really starting to look good. I'm hoping I can get her flipped by the end of April so I can begin the daunting task of epoxying the entire hull and eventually getting her into a trailer to finish off the final month or so of work and hardware installation!
Here's a few pics of the current progress:


I decided to use a few bits of scrap plywood to create the seatbacks. It's probably not quite as professional looking as a solid piece of plywood would have been but I was happy that I saved myself $80. I have a ton of scrap plywood laying around now anyway. This is right after the seatbacks were installed, I have since filleted and sanded all the joints and the entire cockpit area is pretty much just waiting to be fiberglassed.


Despite what the plans dictate, I chose to cut out the hole for the tiller prior to installing the transom skirt. Mainly b/c I wanted to have room to fit the router on the interior and I wouldn't have had room with the transom skirt in place.


See... if the transom skirt had been in the previous picture the router wouldn't have fit on the interior side of the cockpit.


Here is the upper breasthook after installation. You can also see the pieces that make up the dorade boxes in the foreground. They have since been epoxied on the interior side and filleted in place.


They aren't actually filleted in yet in this picture but it gives you an idea of what the dorades look like.

The weather forecast looks pretty nice for the remainder of the week too so hopefully I can fit in some serious work each night. Now that summer is coming I'm definitely getting antsy to get her done and in the water. I really don't want to spend my summer finishing her!

Up next this week is to install all the support pieces for the cabin roof which involves cutting out curved pieces of wood and epoxying them along the curved areas wherever the cabin roof will rest. Then all that needs to be sanded perfectly smooth and anchoring the roof down hopefully later this week. This weekend will involve the beginning of the mast construction (and hopefully correctly the awful cut I made while ripping a 16' piece of sitka spruce) and hopefully a lot of progress toward completing the companionway hood and finishing the fiberglassing of the rudder. Perhaps I'll get started on the tiller as well... We'll see if any good plans come up (read: cute blondes)

Here is a pic of the starboard inspection port on the centerboard trunk. The plastic piece unscrews so you can access the centerboard and either shove it down into the water if it's jammed or some other type of service. It's also kinda cool looking if you ask me. I'm also installing one on the bow inspection port with a nice looking varnished flange that I made. Pics to come soon...

Sunday, February 21, 2010

Gone Skiin...

Sorry for not putting up any updates lately. I have been fortunate enough this winter to spend quite a bit of time out on the slopes this winter with friends and co-workers, and this week will be no exception. I get to spend the first couple days of the work week skiing and call it "work" I will reiterate once again how much I love my job. Nothing all that new and exciting going on recently actually. I have started playing ice hockey again after a good 10 year long hiatus, and the Olympics is giving me the serious desire to learn curling too. I feel as though I would be ridiculously good at that "sport". But nonetheless, it's fun getting back out on the ice and getting rid of some frustrations.
Anyway, on to the boat... I've made a little bit of progress lately although I have slowed down dramatically due to weekend trips and the cold weather hindering my epoxy use. That being said I have begun assembling the cabin walls and the hull topsides and seatbacks. See the pics below.
I thought this one was funny b/c after snipping so many wires to stitch the boat together my wire snips broke. Oh well, they were cheap to begin with.


Here I'm temporarily stitching the topsides in place in order to properly locate the rear cabin wall...
As you'll see here the foredeck is not in place b/c the topsides are only temporarily in place. But you can see the flotation foam that is installed in the bow per US Coast Guard rules...
Here is a look at the cabin rood support beams in place. Eventually the deck and companionway will be here.
Even though the topsides are only temporarily in I think this is a cool picture b/c it gives you a good idea of the hull shape. Notice my footstool to get in and out of the boat is a case of beer. I think that's funny.

Here is the completed rudder, sanded down to 220 grit. This was fun to build b/c it's one of the few pieces I could work on in cold weather, (I brought it inside at night while the epoxy was curing) I still need to coat it in fiberglass and epoxy but that can wait till warmer weather I suppose.
That's it for now... At the moment I'm glassing the insides of the topsides and stitching them in place for permanent epoxy work. Cheerio!


Visits

HTML hit counter - Quick-counter.net

Visitors